
Blog
How to Safely Change the Bulb and Check the Cord.
My Salt Lamp Bulb Died: How to Safely Change the Bulb and Check the Cord.
Your lamp suddenly went dark. It won’t glow anymore. Don’t panic. The salt didn’t run out. The bulb just burned out. This is normal. Changing the bulb is simple and safe if you take two quick steps first. We also need to check the cord. Cheap cords can be dangerous. I’ll show you exactly how to do this safely and easily.
What Kind of Bulb Does My Salt Lamp Need?
Most Himalayan salt lamps use a small, 15-watt incandescent candle-style bulb because these bulbs get hot enough to dry the salt and prevent it from weeping. You must use a bulb that generates heat, not a cool LED bulb, otherwise the lamp will pull moisture and start to melt. Heat is more important than light output for these lamps.
The Right Kind of Heat
A salt lamp isn’t like a regular light. It needs heat for its main job. That job is drying itself out.
LED bulbs are great for saving energy. But they stay cool. If you use a cool bulb, the salt will soak up moisture. Then you get salty puddles. Always use the small, warming bulbs.
The Right Size
The hole in the salt rock is small. You need a small bulb base. Most lamps use the E12 base, which is also called a candelabra base. Check the socket size before you buy a replacement bulb.
Step-by-Step: Changing the Bulb Safely
Safety first. We are dealing with electricity and a heavy rock.
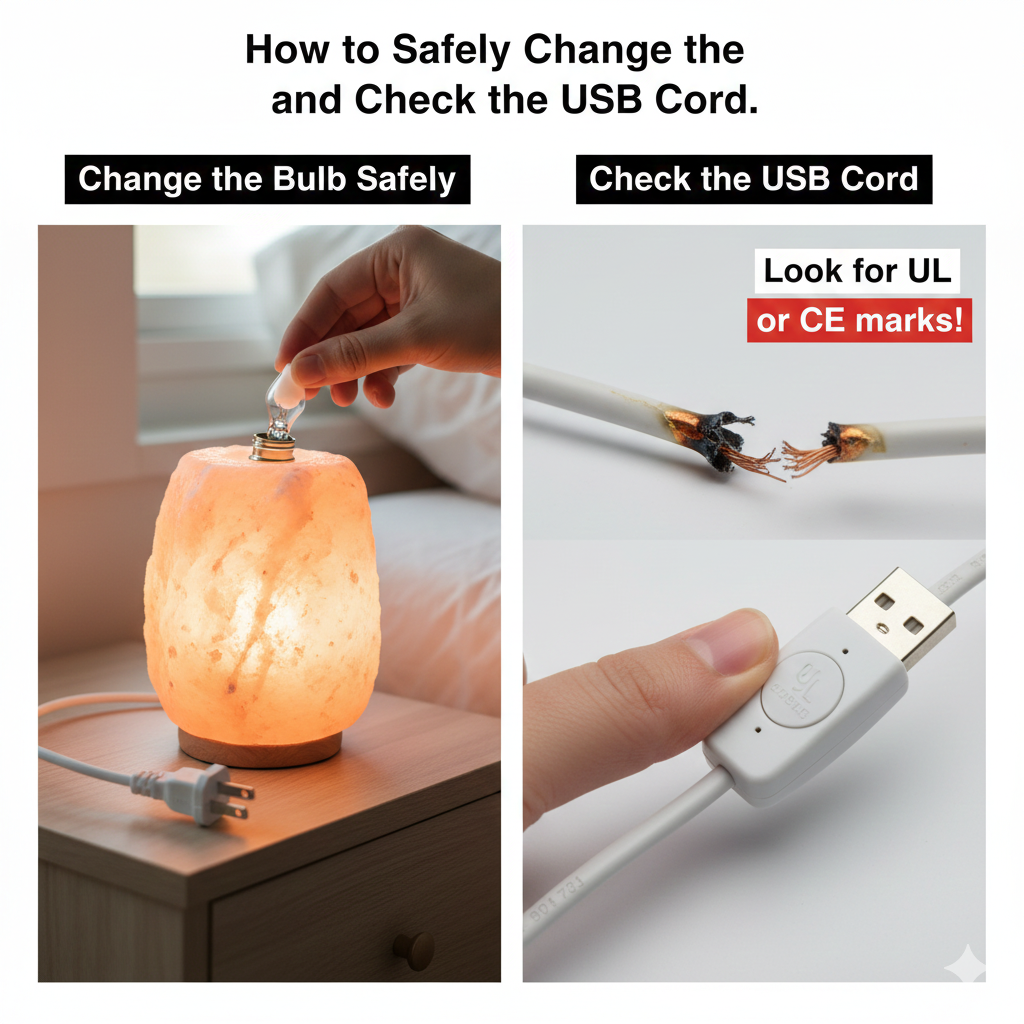
Step 1: Unplug It!
This is the most important step. Always unplug the entire cord from the wall. You don’t want to touch the socket while it’s live.
Wait a few minutes. The old bulb will be hot. Give it time to cool down before you touch it.
Step 2: Remove the Cord
The bulb usually sits inside a small plastic holder. The holder pulls out from the hole at the bottom of the lamp. Pull it out slowly.
Hold the plastic base. Twist the old bulb out. It twists just like a normal light bulb. Don’t force anything.
Step 3: Put the New Bulb In
Screw the new bulb into the socket gently. Do not screw it in too tightly. It might break the glass or the fragile socket.
Push the cord holder back into the lamp hole. Make sure the bulb sits straight up. The bulb shouldn’t touch the inside of the salt rock.
Checking Your Cord for Danger
The cord is the most common failure point. Cheap lamps often use bad cords.
Look for Burn Marks
Unplug the cord and look at the plastic holder. Look at the wires right where they enter the plastic. If the plastic looks melted or scorched, the cord is bad.
If it smells burnt, throw it out immediately. A melting cord is a fire hazard.
Check the Switch
The dimmer switch on the cord can wear out. If the lamp flickers often, the switch might be dying. Replace the whole cord set if this happens. Don’t risk it.
Data Suggestion: STATISTIC/FACT. Remind users that cheap replacement cords often lack safety certifications. Example: “Always look for a safety certification mark, like CE or UL, printed directly on the plastic cord itself.”
Final Thoughts: Keep the Glow On
Changing the bulb is a simple job. It should take less than five minutes. Do it safely.
Always use a warming bulb. Always check your cord for signs of damage. Keep your lamp maintained to enjoy its glow without worry.