
Blog
DIY Rock Salt Lamp Tutorial (Step-by-Step Pictures)
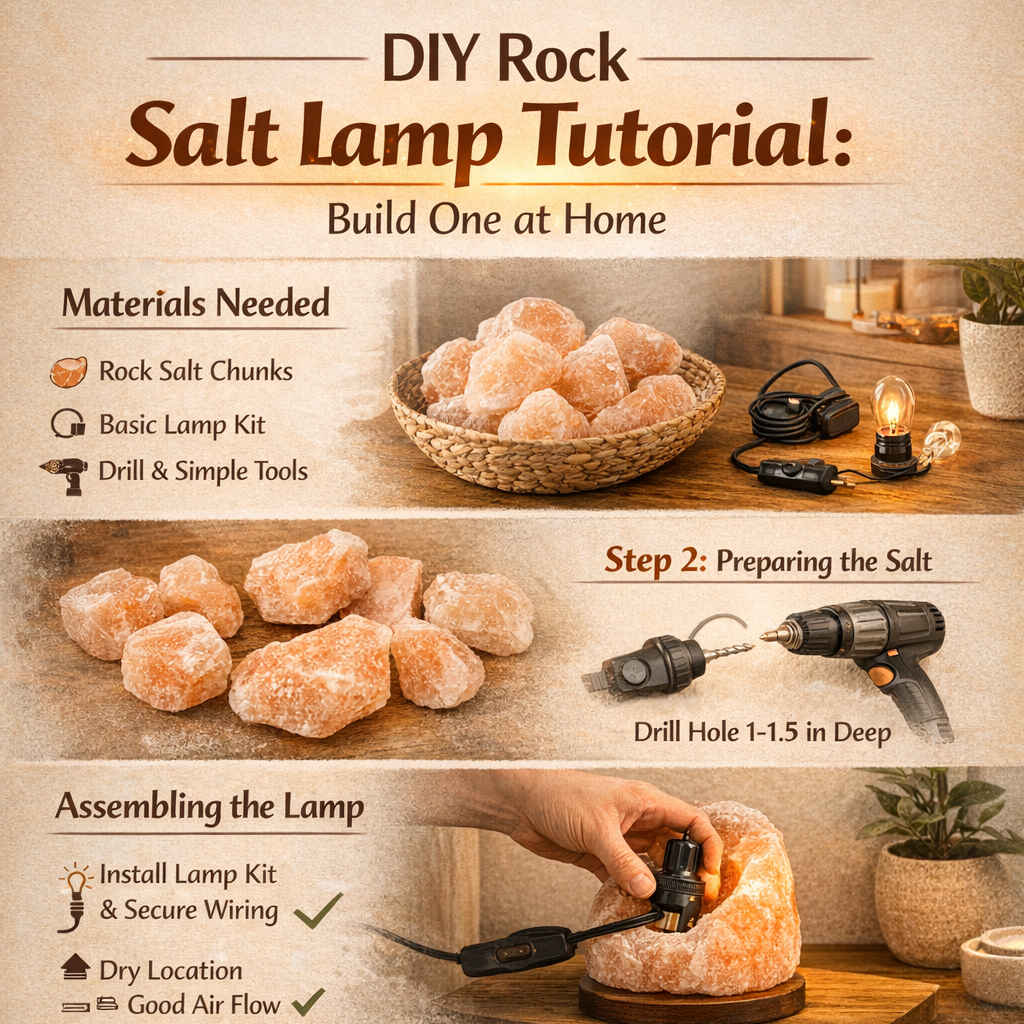
Table of Contents
This DIY rock salt lamp tutorial shows how to make a rock salt lamp at home using simple materials and clear steps. With step-by-step pictures, you can see how rock salt chunks, a basic lamp kit, and a low-watt bulb come together into a working lamp. Many people choose a homemade salt lamp to control size, shape, and placement. This tutorial focuses on an easy, beginner-friendly approach, from preparing the rock salt to setting up the cord and bulb. By following each step carefully, you can build a functional lamp that fits naturally into your home space.
What Is a DIY Rock Salt Lamp?
A DIY rock salt lamp is a handmade lamp created by placing a bulb and socket inside natural rock salt pieces. What makes it different from store-bought lamps is the level of control you have over size, shape, and overall appearance. Ready-made lamps are often polished and uniform, while a DIY version keeps the salt closer to its raw form. Many people choose rock salt chunks because each piece looks different, with natural color lines and rough edges. This approach allows you to create a lamp that feels personal, practical, and suited to your own space rather than mass-produced decor.
Materials Needed for a Rock Salt Lamp
Before starting this DIY rock salt lamp tutorial, gather all materials so the process stays smooth. You will need rock salt pieces that are solid and large enough to hold a bulb. A basic lamp socket kit is required and usually includes the socket and fittings. Choose a bulb and cord designed for low wattage to keep heat levels moderate. For support, consider base options such as a wooden disc, metal plate, or sturdy tray. Having these materials ready helps keep the build simple, organized, and easier to complete from start to finish.
Tools You’ll Need Before You Start
Preparing the right tools before beginning this DIY rock salt lamp tutorial makes the process easier and safer. Most of the work can be done with basic household tools, such as a drill, screwdriver, and measuring tape. A drill with a suitable bit is important for creating space inside the rock salt for the socket. For those who want neater results, optional tools for cleaner results include a clamp to hold the salt steady and protective gloves for better grip. Having everything ready helps keep each step smooth and avoids interruptions during the build.
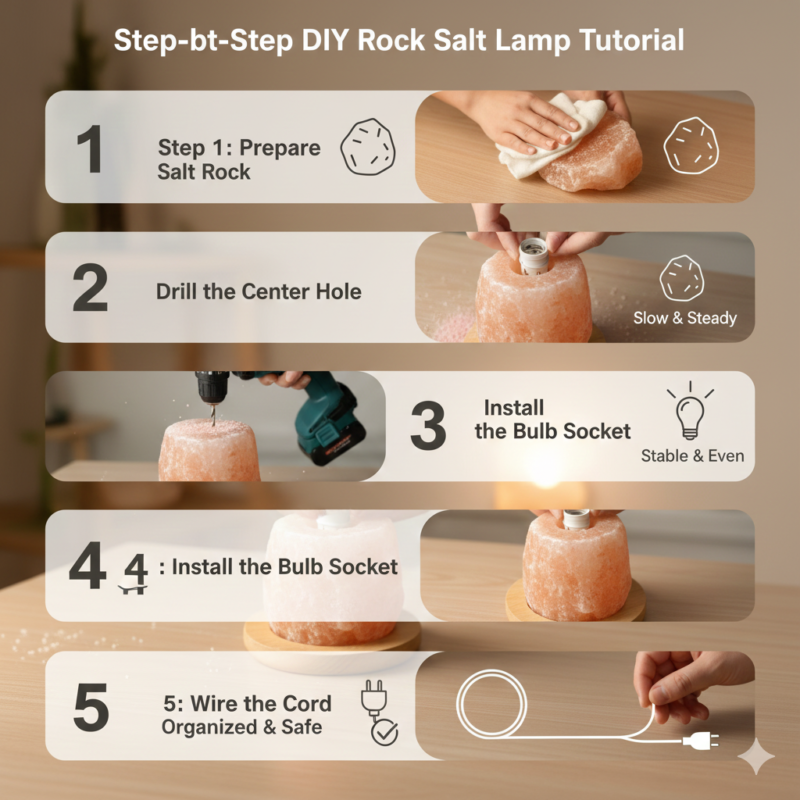
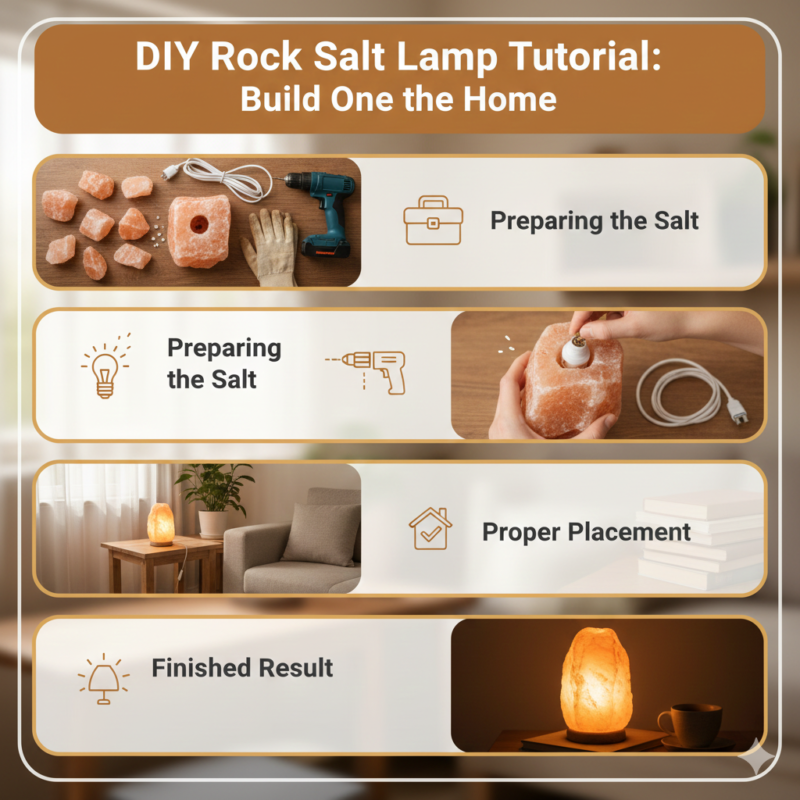
Step-by-Step DIY Rock Salt Lamp Tutorial
Begin by preparing the salt rock. Choose a stable rock salt piece and wipe off loose dust. When drilling the center hole, work slowly and keep the drill straight so the opening fits the socket. Next, install the bulb socket by placing it firmly into the drilled space. After that, secure the base using screws or adhesive so the lamp stays steady. Finish by wiring the cord according to the socket kit instructions. Step-by-step pictures for each stage help show hand placement, depth, and positioning, making the process easier to follow for beginners.
Safety Tips While Making a Salt Lamp
Safety should stay a priority during every step of a DIY rock salt lamp tutorial. For electrical care, always unplug the cord while working and follow the lamp socket kit instructions closely. Use only the recommended low-watt bulb to reduce risk. Heat awareness is important because bulbs can become warm during use, so avoid touching the socket right after testing. A stable setup also matters. Make sure the salt rock sits flat on its base and does not wobble. Working slowly, using steady tools, and checking each connection helps keep the process safe and comfortable from start to finish.
Testing and Setting Up Your DIY Salt Lamp
After completing the DIY rock salt lamp build, begin with the first power-on to confirm everything works correctly. Plug in the cord, switch the lamp on, and check that the bulb lights evenly without flickering. Next, focus on checking stability by gently pressing the lamp from different angles to ensure the base holds firm. If it shifts, adjust the base before regular use. For placement ideas, choose a dry, flat surface such as a side table, shelf, or desk. Proper placement helps the homemade salt lamp sit securely while providing soft, comfortable light in everyday spaces.
Common Mistakes to Avoid
When following a DIY rock salt lamp tutorial, a few common mistakes can cause problems later. Using an incorrect bulb type is one of the most frequent issues. Always choose a low-watt bulb recommended for lamp kits to avoid excess heat. Poor balance is another concern, especially if the base is not secured properly. A lamp that wobbles can be unsafe over time. Moisture exposure should also be avoided, as rock salt naturally attracts humidity. Keeping the lamp in dry areas and checking stability during setup helps prevent these issues and supports long-term, reliable use.
Conclusion
A DIY rock salt lamp is a practical project for anyone who enjoys hands-on home decor. By following clear steps, using the right materials, and paying attention to safety, it is possible to create a lamp that feels personal and functional. This tutorial shows how rock salt chunks, a basic lamp kit, and careful setup come together in a working result. Taking time with drilling, wiring, and placement helps avoid common issues later. With proper moisture control and correct bulb use, a homemade salt lamp can remain stable and usable for a long time, fitting naturally into everyday living spaces.
FAQs About DIY Rock Salt Lamps
Is a DIY rock salt lamp hard to make?
Most people find it manageable with basic tools and careful steps.
What type of bulb should I use?
A low-watt bulb designed for small lamps works best.
Can any rock salt piece be used?
Choose solid rock salt chunks without cracks for better stability.
Do homemade salt lamps last long?
Yes, with proper care and moisture control, they can last for years.
Where should a DIY salt lamp be placed?
Dry areas such as living rooms, bedrooms, or offices are ideal.
2 thoughts on “DIY Rock Salt Lamp Tutorial (Step-by-Step Pictures)”